More Pixels Please!

I reluctantly sold a 20" 1600x1200 Viewsonic with the desktop machine when I switched to my current T60 laptop (14" 1400x1050) about a year ago. The screen is not the strongest point of the T60, and that feeling has just been reinforced by looking at some 22" Samsungs at work. Now prices have plummeted again so I convinced myself that I need a 24" 1920x1200 Samsung 245B!

I need a smart way of managing my desktop for normal mobile use (1400 pixels wide), working at home with this new toy (1920 wide), and giving talks/lecturing with video-projectors that are usually only 1024 wide. Any ideas?

Google map test drive: IOM Worlds sites

I've discovered that you can embed a google-map in your blog- great! Just to try out this fun new feature here are the sites of the IOM-worlds for 2003, 2005, and 2007.

2007 Marseilles, France (event to be held 12-21 October 2007)


View Larger Map

2005 Moolooloba, Australia


View Larger Map

2003 Vancouver, Canada


View Larger Map

Can anyone contribute with the ones I am missing (I didn't compete so I don't know where the sailing took place):

  • 2001, Omisalj, Croatia
  • 1999, Malta
  • 1997, Wellington, NZL
  • 1994, Poitiers, France

pyVCP m5i20 HOSTMOT-4 test panel

For testing the servo-drives and all the electronics I found this test-panel for the HOSTMOT-4 conifiguration of the m5i20 quite useful.

It uses an XML file (iotest.xml) to define the pyVCP panel layout, and then a HAL file (pyiotest.hal) to hook up the IO pins of the m5i20 to the panel. I'm also using a shell script (iotest.sh) to start the realtime environment and run pyvcp followed by the HAL file automatically.

Compare this to my earler effort with the old VCP. Now with many more widgets in pyVCP I have better control of the DACs etc.

2007 Nordic IOM-Race 2, Turku, Finland

13 skippers (8 FIN, 4 SWE, 1 NOR) competed in race 2 of the Scandinavian Cup 2007 (*) organized by TPS in Turku, Finland during the weekend of 1st and 2nd of September 2007.

Saturday started dramatically with a thunderstorm interrupting race 1, and most boats changing down to no2 rig for the rest of the day. A nice wind direction enabled a long course with skippers being able to walk 1/3 to 1/2 of the course up and down along the pier. 12 races were completed. Saturday was completed with an event dinner with our race-officer Harri Korpela as chief chef.

Sunday began with more wind and some risk for rain. Most skippers started out with no2 rig, but some more or less successful trials were made with no1 rig throughout the day. 12 races were completed.

The winner, Torvald Klem from Norway, sailed the most consistently and only let about six heat-wins slip by. He sailed a new Extreme design from Jeff Byerley/Australia. Only the second time in no2-rig conditions for this boat. Second place Olle Martonen sails a home-built wood/glassfiber TripleCrown, while third place Timo Syren used a SailsETC Italiko, also taking home the Finnish Class Champion title.

A few new boats were also seen on the race-course. Anders Wallin and Eero Laurila sailed Noux Mk2 designs with still a bit of room for improvement on the trimming and manouverability side. A swedish prototype of the Peter Norlin designed IOM (onemeterfun.se) also competed in its first international event.

Results here.

(*) for some good reason these races are now called "Scandinavian", a word that is about double in length, and geographically incorrect, compared to "Nordic".

Is your boat watertight?

Here's a nice way of finding leaks in the boat. Do it like you would search for a hole in a bicycle inner-tyre: gently pressurize the boat (we use an air-brush compressor with a not too tight fitting tube into the boat), press it underwater or use a water/soap solution on the outside, and look for places where bubbles appear.

Simple and efficient. Also much safer and faster than pouring water in the hull and waiting for it to appear on the outside. Handling a boat with 1-2 litres of water in it is not very easy - don't ask me how I know!

Turns out my boat has a number of cracks along the hull-deck join, and also a small hole at the top of the finbox. These can probably be filled with cyano glue.

KISS IOM Construction

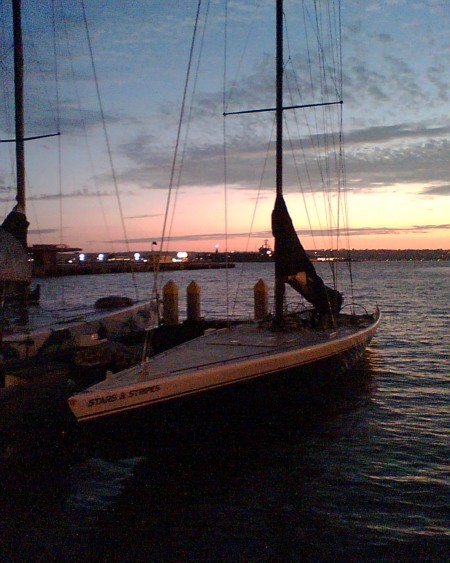
(click image for high-resolution version)

The current Noux Mk2 construction is obviously too difficult to put together. There are lots of separate mouldings that need to be fit and bonded to the hull, lot's of sanding, filling, and painting. So I'm trying to think of a simpler design that would be easier to build. With all the moulds and jigs ready my dream would be to spend one whole day on moulding: hull, deck, fin, rudder, etc. Go home and sleep/do other things while everything cures for a day or two, and then spend the next day bonding together the components. With about two full days of work I would hope to create a ~500 eur kit which can be handed to an intermediate to advanced IOM-skipper which he/she could then complete by adding fittings, radio, and rigs. Is this Utopia?

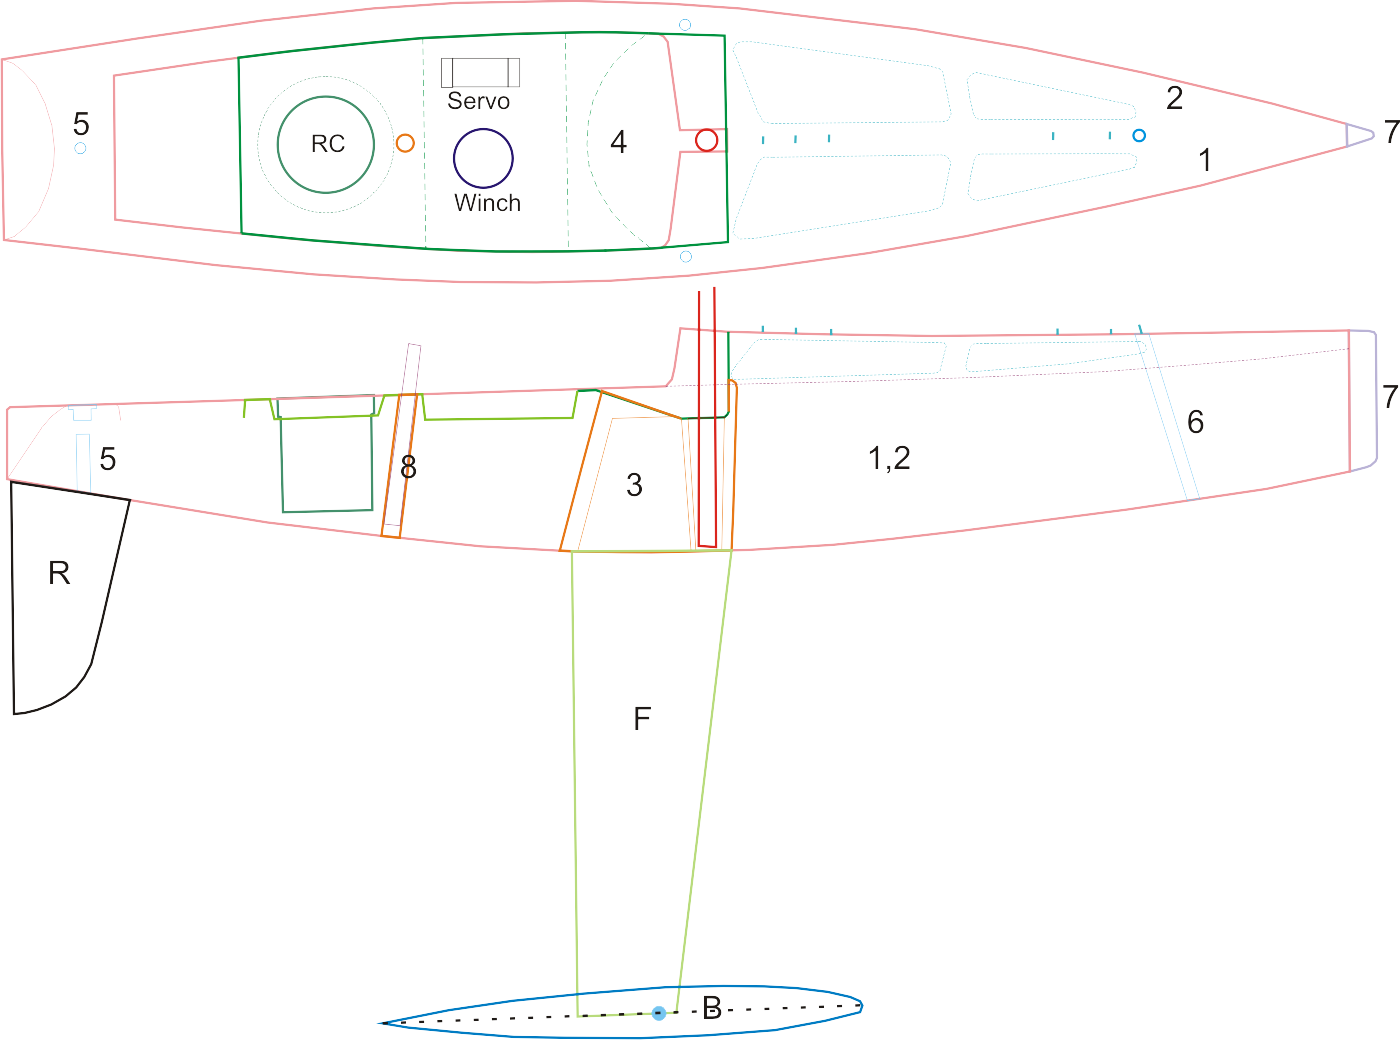
The Bantock/SailsETC style of construction (Topiko-ish drawing above) simplifies building somewhat. The two halves of the hull (1,2) are moulded separately and then joined. A separate fin/mastbox laminate (3) needs to be bonded into place while the hull is in a jig, to keep everything nice and straight. The foredeck comes 'for free' in the hull moulding process, but the aft deck (4) is a separate moulding. Here I've drawn a recessed flat part for mounting the winch and the servo, and a place for the 65mm RC-pot aft of the main-sheet post.

Then there are small bits and pieces like the rudder tube (5), the tube for the no1 rig (6), and the bow bumper (7).

Sails ETC sells a cheap plastic rudder (R), and some not-so-cheap fins (F). We can make bulbs (B) in lead by casting, or maybe in brass or steel by cnc-turning in the future.

I really feel the challenge is in components 1 through 4, the large mouldings that need to be accurately assembled, and apart from the finbox need to have a nice gelcoat outer finish. With the Topiko-style transom the two hull-halves (1,2) can't be assembled in the hull mould, so a separate hull mould without the inverted transom is needed. This assembly-mould/jig could also have a permanent hole for a dummy-fin that is put in place and aligns the separately moulded fin/mastbox (3). The aft-deck (4) would then be bonded in place with the help of strips of glassfiber plate glued to the underside of the hull-flange.

If I count the building tasks correctly I get something like this:

  1. Mould two hull-halves. (spray mould with gelcoat/paint, apply epoxy+2x125g glassfiber, trim glassfiber to mould-edge)
  2. Mould other components: deck, fin/mastbox, mainsheet-tube, no1-rig-tube, bumper (in silicone)
  3. Wait for everything to cure
  4. Assemble hull-halves in separate jig. bond together. Glue in fin/mastbox, Glue in deck (can this be done simultaneously with finbox?). Glue in rudder tube.
  5. Wait for everything to cure
  6. Finish by adding bits and pieces: open foredeck holes, glue in no1-rig tube, glue in mainsheet-post tube, attach bumper.

That's three tasks separated by curing-time. I'd be interested if anyone has some thoughts on this! Have I overlooked something big? Can this be simplified further?

I know some people have used closed-mould techniques with a pressurized balloon inside to mould complete boats in one go. But as there are no good descriptions of this online I'm not going to pursue that in the near future.

San Diego, California

I'm in San Diego for the SPIE Optics & Photonics meeting. More specifically Kishan Dholakia and Gabe Spaldning put together the Optical Trapping and Optical Micromanipulation IV conference, where I was the last (but not least?) speaker. Overall the meeting has a dual character with a lot of technical content (like lens- or mechanics-design, CCD/CMOS imaging, etc.) but also a strong academic following with 'plasmonics' and 'nanobiotronics' being the buzzwords of the month. Supposedly the attendance is around 5 000 persons, but it felt less crowded than the Biophysical Society meetings (3 - 4 000 people), maybe because people were spread out over many more sessions.

Travelling via JFK my baggage was delayed about 36 h, but otherwise the trip went fine.

Cool image re-sizing video

I wonder when this technology is coming to a WordPress/FireFox near you? I'm always frustrated by having to re-size photos to a specific column width (450 pixels in my blog right now), and then manually linking the pictures to larger versions (usually 1024 pixels wide). This cool technology should allow me to just upload an image, attach it to the post, and then it re-sizes depending on the theme or the browser used.