CNC machined tiller arms

Jari sent me some pictures of tiller arms that he machined during the weekend.
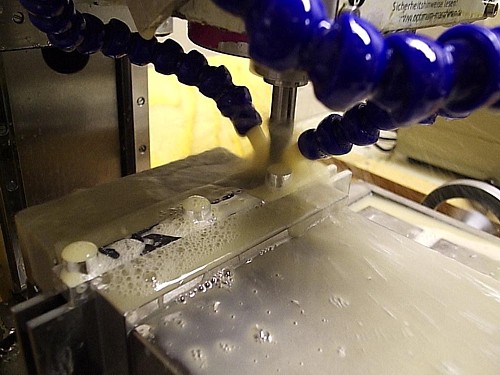
These parts need to be machined in three separate stages, here's stage 1 where the tillers are first roughed and then finish milled.
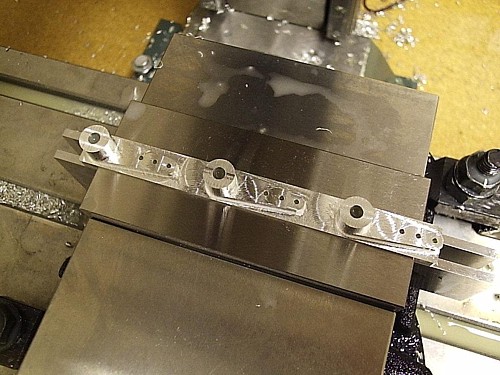
Here's what the parts look like after the first stage. After finishing the hole for the axle and three holes for the push-rod are drilled. In stage two the parts are turned 90 degrees and fixed using a jig. A hole can then be drilled and tapped for a set-screw that will tighten against the rudder axle.
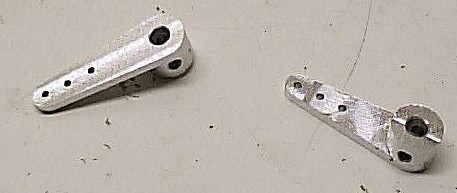
In stage three the whole thing is flipped over and the bottom of the stock material is machined off, which results in these completed parts.

These are still prototypes, for the Noux Mk2 I'd like to see two things: (1) assembly of the boat without tools, i.e. the attachment of the tiller arm to the rudder axle should not require any special tools (allen key, screw driver, etc.). This could be achieved with the current design simply by using a screw with a thumwheel. (2) a fixed relative position between tiller and rudder axle, i.e. when I attach the rudder I want to be sure it sits straight without having to check it everytime and possibly re-trim on the transmitter. A low-tech solution is to file or grind a flat part on the rudder axle onto which the set-screw pushes. If anyone has better ideas I'd be glad to hear about them !

Update 2006 Dec 05:

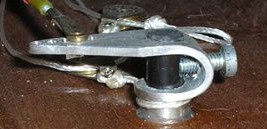
Johan Prak from the Netherlands sent me a picture of his homemade rudder fitting. A very simple design that anyone can make:
Noux Radio Installation

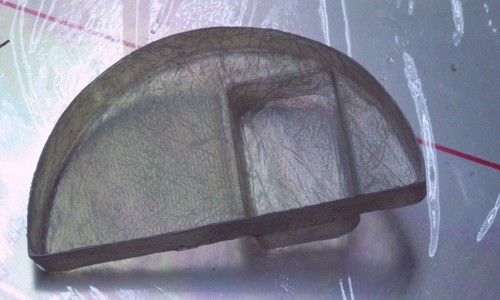
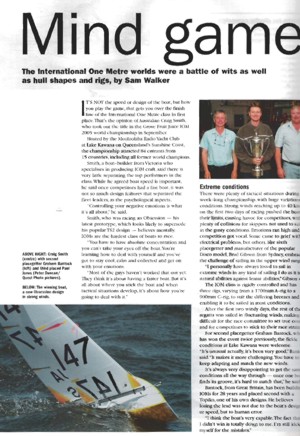
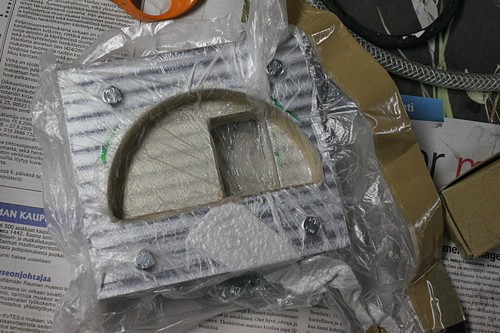
This is the shape and placement I finally settled on. Above is the mould, cnc milled from two 15mm thick pieces of aluminium bolted together. Very similarly to Craig Smiths Obsession I am going to mount the RMG winch on one side, and have a compartment for the battery on the other side. This is not the conventional way to do vacuum moulding, here I'm using only a bag, normally the laminate is followed by a release film, and the a breather (white fabric above), but I find all of this too complicated for small parts. Using just the bag works almost as well, an improvement is to use more of the breather around the laminate so the pressure spreads a bit more evenly. Vacuum bagging need not be high tech: the bag is a plastic bag used for selling fruit in a supremarket, and our pump is an old refridgerator compressor I got second-hand from a repair shop for about 5 eur...

Here's the finished part. Surprisingly stiff with three layers of 165g twill weave glassfiber - it must be all the shapes and angles that does it. Moulded with a vacuum bag (above) to ensure that the fibers follow all the 90-degree bends a bit better. In the picture the bottom of the battery compartment is still in place - the bottom will obviosly have to come off and I will fit some other support for the battery which is about 50mm deep. I didn't want to mould something that was a 50mm deep hole in one go, this part is hard enough to release from the mould as it is.

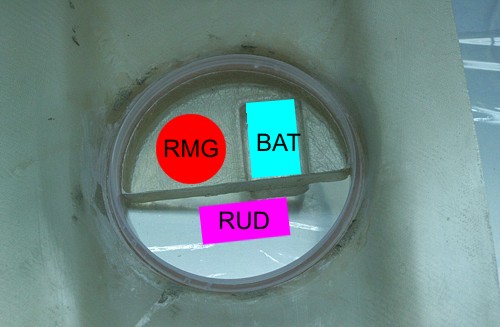
This is what the RC-tray looks like when mounted in the boat. Here we have first the pot-recess which is moulded into the aft-deck. Into that recess the rim of the rc-pot is pressed, and the rc-tray laminate fits into the pot-rim. I've indicated using colors and text approximately how the components are going to be installed. The tray will be fixed to the rim and deck using three M3 screws, which will thread into rivet-nuts that are epoxied to the aft-deck. The rudder servo will require its own mounting bracket - that's next on the design/build to-do list.

X-peak 3 plus

I've sold my Cockatoo (some setup notes and pics still to come I hope...), and along went most of my other gear, batteries, charger, Tx, two RMG's etc. So I'm slowly replacing everything during the long and dark Finnish winter - hopefully to see an operational new Noux sailing in April '07 or so...

Here's the new charging system - very similar to the one I used previously. The charger is the new updated 'Plus' version of the Jamara X-peak 3. This charger is also sold under numerous other names (swallow, etc.). The plus version has slightly increased maximum charging and discharging current specifications compared to the old one, otherwise it's mostly the same. A backlight has been added to the lcd screen - useful in dark and dim places. It runs off 11-15 VDC so at home I use a switched mode powersupply (black, right) to transform mains electricity to 12 VDC at max 2.5 A. I chose the 30 W PSU for it's convenient size, it fits in the toolbox whenever I go sailing, but it does mean I'm limited to max 2.5 A charging current. The switched-mode circuitry will accept any AC voltage between 100 and 240 V, so abroad I can simply use an adapter (white plugs, bottom). At a sailing place without mains electricity, an adapter for the cigarette-lighter connector in a car (left) can be used.

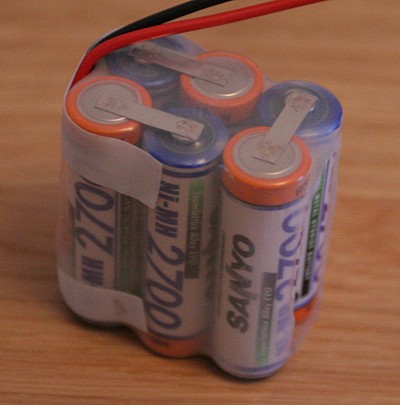
The new batteries are AA Sanyo cells with a capacity of 2700 mAh. I got the spot-welded from beatcom, much better than risking damage to the cells when soldering by hand. I've fitted a transparent heat-shrink myself - I'm hoping it will allow me to spot any leaking cells or corrosion on the contacts. I got a pack for the Tx also, which with the DX6 voltage regulator mod should last for more than a whole sailing day.

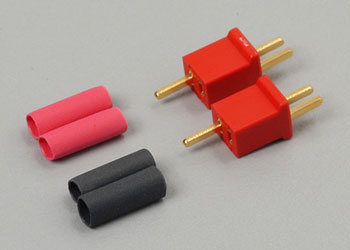
Since a few years now I'm using the Deans Micro 2R plugs. It's a nice system where the plugs are identical, you just switch polarity between battery and charger (in my system the battery + pole is connected to the pin). I like the fact that these have no moving parts, are gold plated, and can be assembled without any special tools (just a soldering iron). They're also small (I understand these are popular with indoor flyers) and are rated for a high current.

A new Shuffle


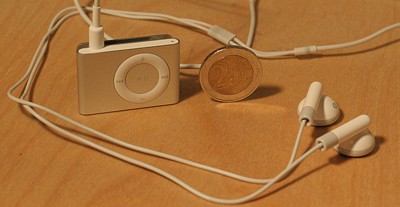
Based just on images on the web, I immediately decided to pre-order the ultra-cool new Apple Ipod Shuffle.

I got free shipping when pre-ordering, and the good news is that applestore actually held their pormised shipping date - it arrived by courier today !

After just 10 minutes with the unit I'm almost certain it's a 'keeper'. It's tiny, very light, has a built-in belt-clip, and stores up to 1 Gb. One feature I missed on my previous mp3 player was a FF/REV within one song, but that doesn't seem implemented... a keypad-lock similar to cell-phones is a nice touch though.

The manual suggests first installing iTunes, and then plugging in the unit. Without iTunes, I tried just downloading songs onto the shuffle but that won't work, why Apple ? why ? 🙁 . I don't need or want iTunes, so I'm thankful to people like Martin Fiedler who take the time to create workarounds. Martin's shuffle-db worked like a charm !

A new spindle for our Opti CNC mill

Jari has been busy planning and building a new spindle for our CNC mill. The project is now about half-way so I thought I'd take a few pictures and write some text.
So far we've been using the stock spindle on the Opti BF20 which has a Morse Taper #2. The original motor burned out at some point so we had to replace it. But as our machine has run for probably hundreds of hours already the bearings are showing some serious wear. We measured a runout of more than 0.05 mm...

On the left the new spindle, Morse Taper #3, from littlemachineshop, a bargain at $34.95 !. It's sold as a lathe spindle, but we thought we'd get the longest spindle they have to place the bearings as far apart as possible for rigidity.

This is part of a larger upgrade plan for the mill which will include replacing the dovetail ways of the stock mill with linear bearings, replacing the standard acme screws with ballscews, and upgrading the control electronics to use AC servos.

The linear bearings are 15mm wide and manufactured by IKO. We got the ballscews from metallstore (I think they are made by HiWin), and the Sanyo AC servos are from last years surpluscenter sellout of Sanyo AC servos. Three 400 W servos will direct-drive the ballscrews (I hope the torque will be more than enough, otherwise we will have to resort to gearing as is often done with servos). A 1 kW servo will be used as the spindle motor. I'm hoping that using a servo as the spindle motor will allow rigid-tapping eventually. Finding affordable servodrives for the AC motors (sinusoidal 3-phase commutation based on hall sensors and/or 2000 ppr encoder) is not easy, so I've actually had a go at building my own drive (also check out Tero Kontkanens effort).

Everything will be controlled by EMC, with a Mesa Electronics M5I20 PCI-card for I/O.

Some pictures of the spindle assembly and toolholders below...

Continue reading A new spindle for our Opti CNC mill

More 2.4 GHz radios and modules

Predictably, more and more RC-manufacturers are introducing "crystal-less" 2.4 GHz remote control systems.

Spektrum has come out with a new 7-channel system called the DX7. It's not on their website yet, but Horizon hobby has it for sale. This one is supposed to be a radio for 'real' models, not only meant for park-flyers like the DX6. I wonder if there will be a problem with 'CE' approval with regards to the output power - A rumor I heard was that the 'CE' marked version of the DX6 has a reduced output power compared to the US model ??

There's also a new player on the market, Xtreme Power Systems, which will introduce their new xtremelink module+rx combo shortly. They too promise increased range and reliability. In contrast to Spektrum, who talk about either 40 or 80 simultaneous working modules, Xtremelink claims up to 390 000 simultaneous active modules ! Also, up to 1 mile ground based range. Pricing and deliverytime still open.

The Futaba modules I noticed back in January were on display at Model Expo in the spring but the local agent said it would take some time before they come to market. I've detected no activity in the Futaba camp so far...

For the new boat, I've bought myself a DX6. Naturally I'm going to mod it a bit before use ;). I've ordered a switched-mode regulator which supposedly will reduce the current drain of the Tx a lot. Also, I've gotten very used to the 'no antenna' look and feel of the Futaba 3VCS with a Spektrum module (especially usefull when it rains, the whole radio goes inside the Tx-cover, no leaking hole for antenna needed). But the stock DX6 has an antenna that sticks out :(. Cell-phones have had internal antennas for years and nobody buys phones with external antennas anymore - so the DX6 antenna needs to go inside the case too ! I'll report later how that goes...